Connecting DAQAstra
Power Supply
Before getting into network setup, ensure there is an appropriate power source for the DAQAstra. If you have access to a PoE switch, both the power and connection are in the same cable, so there is no need for a power supply. If you do not have PoE, you'll need a DC power supply that outputs anywhere in the range of 12-32V and connect it to the AUX power (the top-leftmost pin on the 34-pin header) and any of the ground pins. Refer to the pinout.
Networking Options
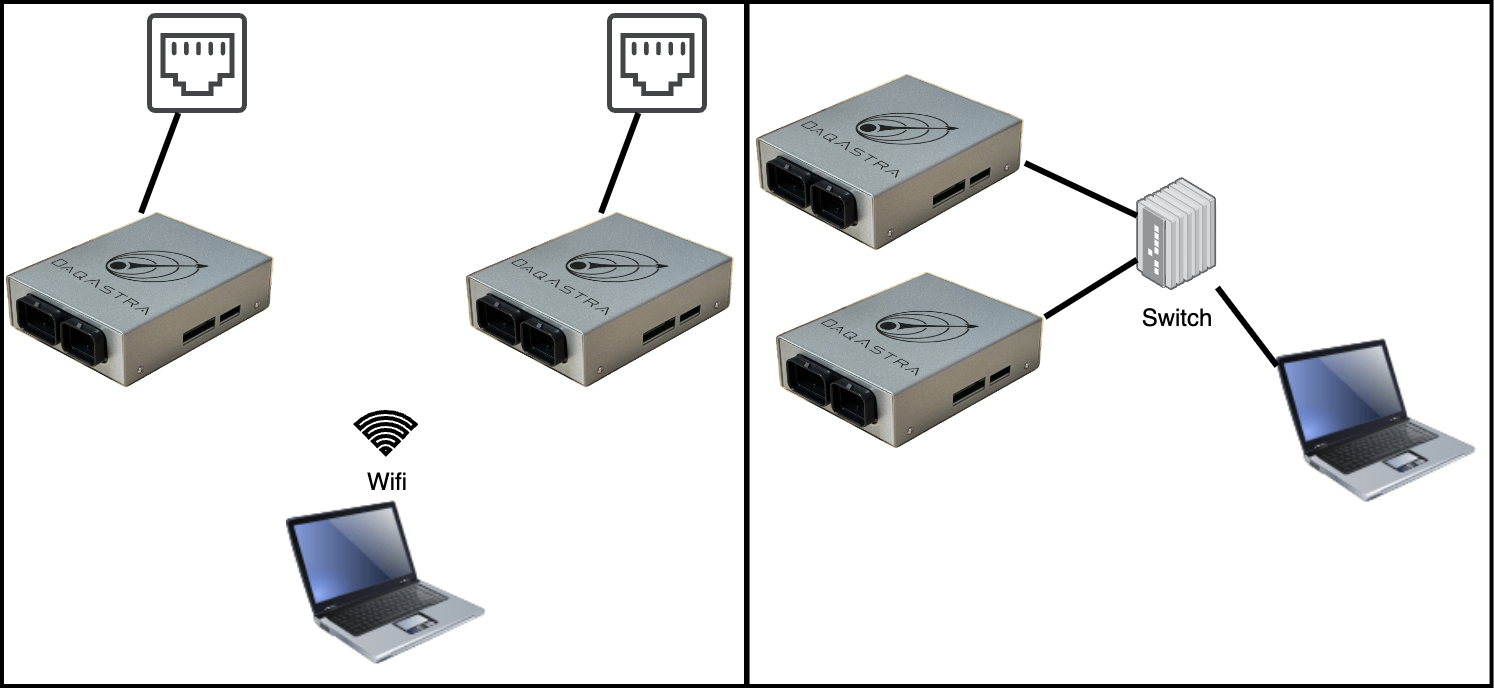
There are two standard network architectures a user can employ in order to use the DAQAstra system.
The most simple approach to connecting a DAQAstra is to use an existing local-area-network (LAN) that provides a DHCP service. This can be as simple as connecting an ethernet cable connecting your WiFi router and DAQAstra and connecting the DAQAstra to a power source. In this case, one computer shall be the host & manager of all DAQAstra(s) on that network.
The second configuration option, Link-Local is for the case where the user wants to plug the DAQAstra(s) directly into their computer without exposing the boards to LAN. This configuration requires the least external hardware, but requires some setup on the user's computer.
Local-Area-Network
Link-Local
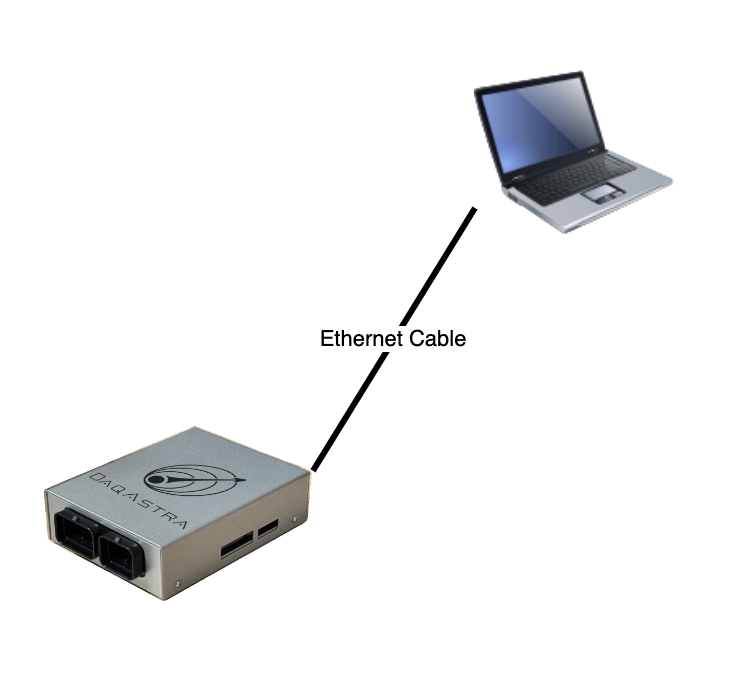
In order to use DAQAstra by plugging it directly into a computer, the user must set a static IP address on the interface that the DAQAstra is connected to. Examples are shown below of how to do this on Windows, MacOS, and Ubuntu.
All DAQAstras are shipped from the factory with a default static IP Address of 10.0.0.6. This is configurable and will be covered.
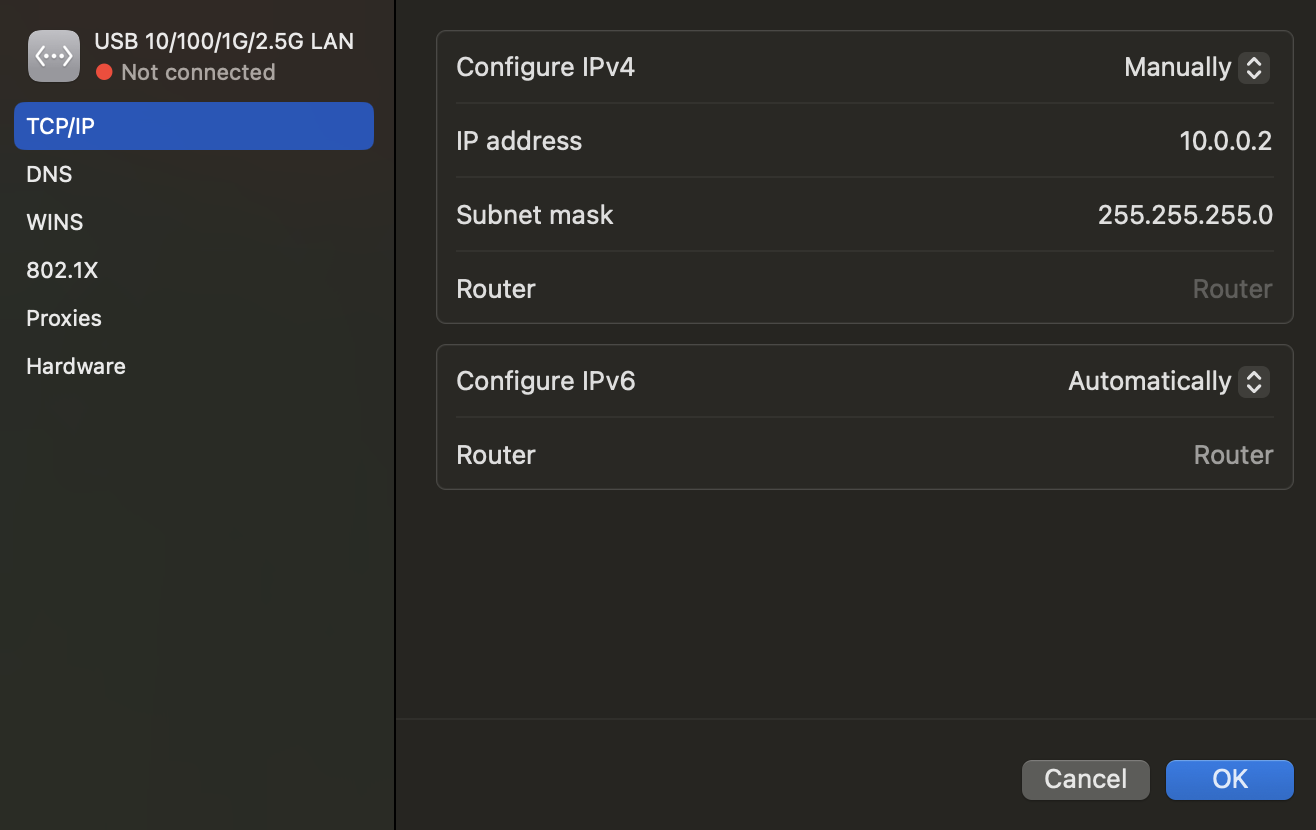
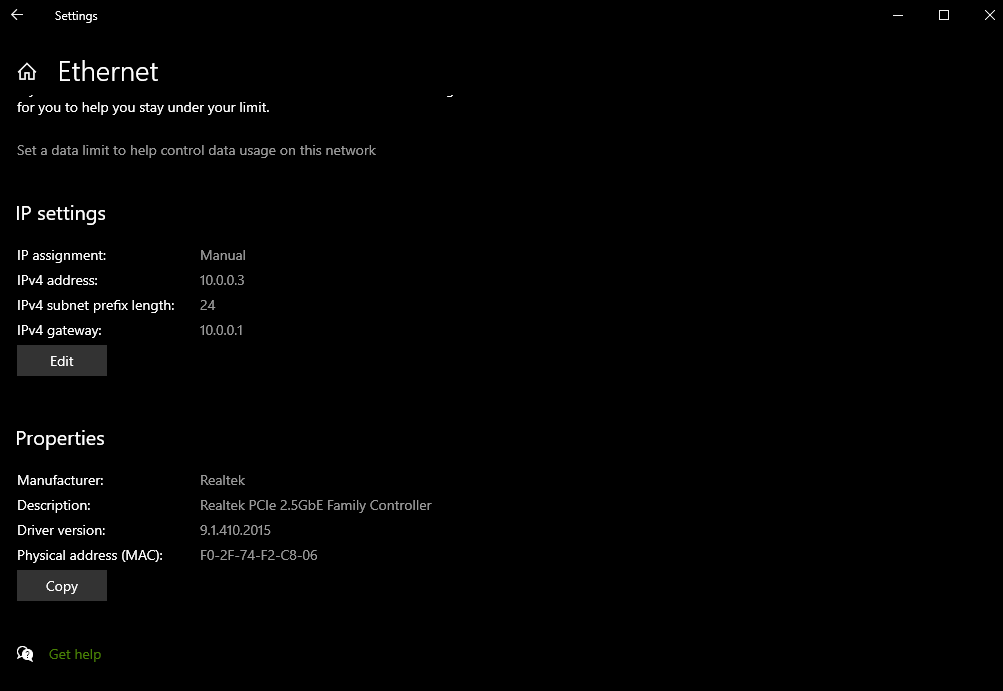
Generally, it would be sufficient to set your network interface to have the following settings:
- IP Address: 10.0.0.2
- Subnet Mask: 255.255.255.0
- Gateway/Router: 10.0.0.1 (Leave unset, if possible)
After doing this, plugging a DAQAstra to the configured interface should result in a new Factory device in the Device Pool list in the UI. If this does not happen, check the following:
-
Is the DAQAstra powered? Is the Ethernet link (green) LED on? If not, check the cable connection.
-
If the link LED is lit, try opening a terminal window and run
ping 10.0.0.6to ping the IP address of the connected DAQAstra at its default address. The activity LED (yellow) should blink too. If not, likely, the interface configuration has an error. -
If on Windows, be sure to add the DAQAstra executable to the allow list in firewall settings. You can do this via the 'Let An Application through Windows Firewall' configuration page via Windows search.
Assuming the DAQAstra connects, you now have the ability to modify its default static IP address via the application. This is an important step if multiple DAQAstras are desired on link-local as each one will need to use a different static IP address. In this situation, only connect a single DAQAstra at a time, adjust that DAQAstra's default address, then plug in the next and do the same.
One can also migrate the DAQAstras off of the 10.0.0.X subnet using this same methodology if it is not available for use for your purposes. Simply change each DAQAstra's default static IP address to the new subnet one at a time and finally change the application host computer's interface IP configuration to use an address on the desired subnet.
Windows Link-Local Setup
MacOSX Link-Local Setup
-
Locate a USB-C to Ethernet adapter to use with your Mac if there is no integrated ethernet port on your system.
-
Plug it in. This will create a new
Serviceunder the Network tab in System Settings. -
Click on the service and then click
Details. UnderTCP/IPyou'll be able to input the settings mentioned above after settingConfigure IPv4toManually.